PDF Annotation for iPad
User Guide
Everything you need to get up and running, from importing your first document to exporting a finished proof.
1 Getting Started
Stampede works with any PDF: proofs, contracts, manuscripts, reports, research papers, or any other document your work requires. You can bring a PDF into Stampede from several places — wherever your file already lives.
How Stampede handles your documents
When you open a PDF, Stampede makes its own working copy and holds it in your Recent Documents list. Your original file is never touched. Annotate freely, and when you're satisfied, export the finished version. There is no "Save" step to remember.
Importing from the Import button
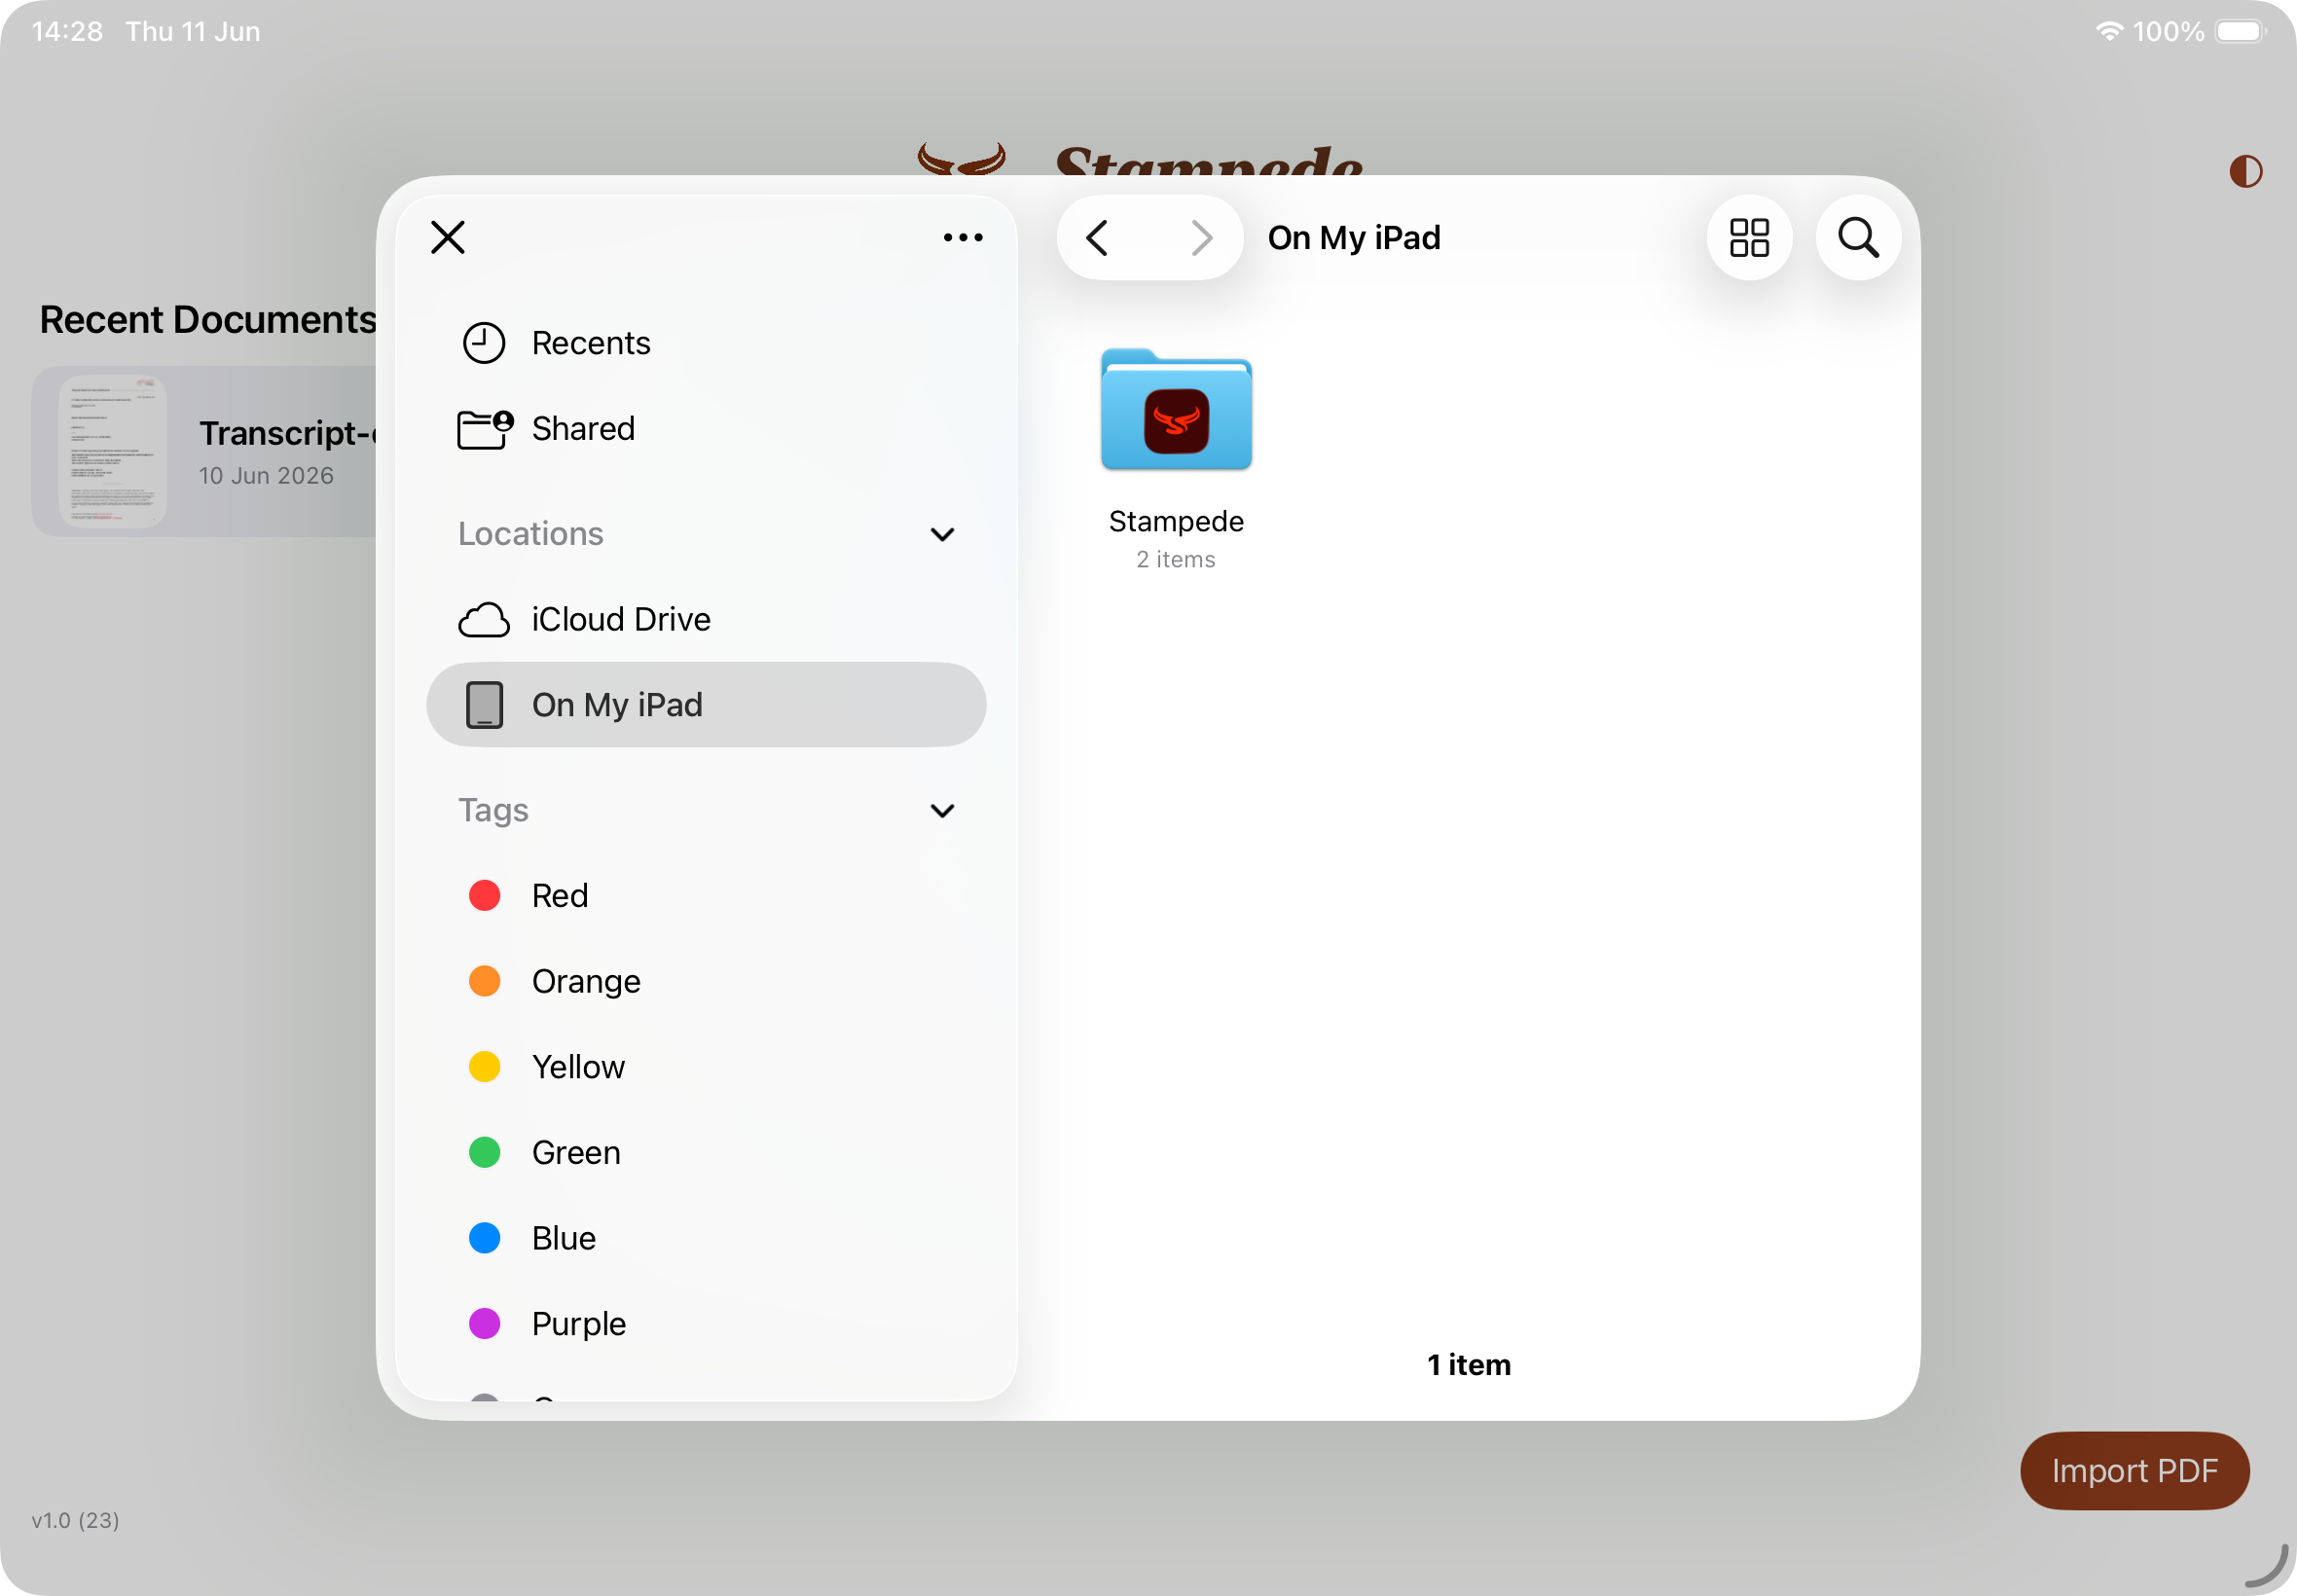
The quickest way to get started is the Import PDF button in the bottom-right corner of the home screen. Tapping it opens the iOS Files picker, where you can browse:
- —On My iPad — documents saved locally, including the Stampede folder
- —iCloud Drive — any PDF synced to your iCloud account
- —Dropbox, OneDrive, or other providers — appear in the Locations list if you have those apps installed
- —Recents — files you've accessed recently across apps
Importing from Safari (or any browser)
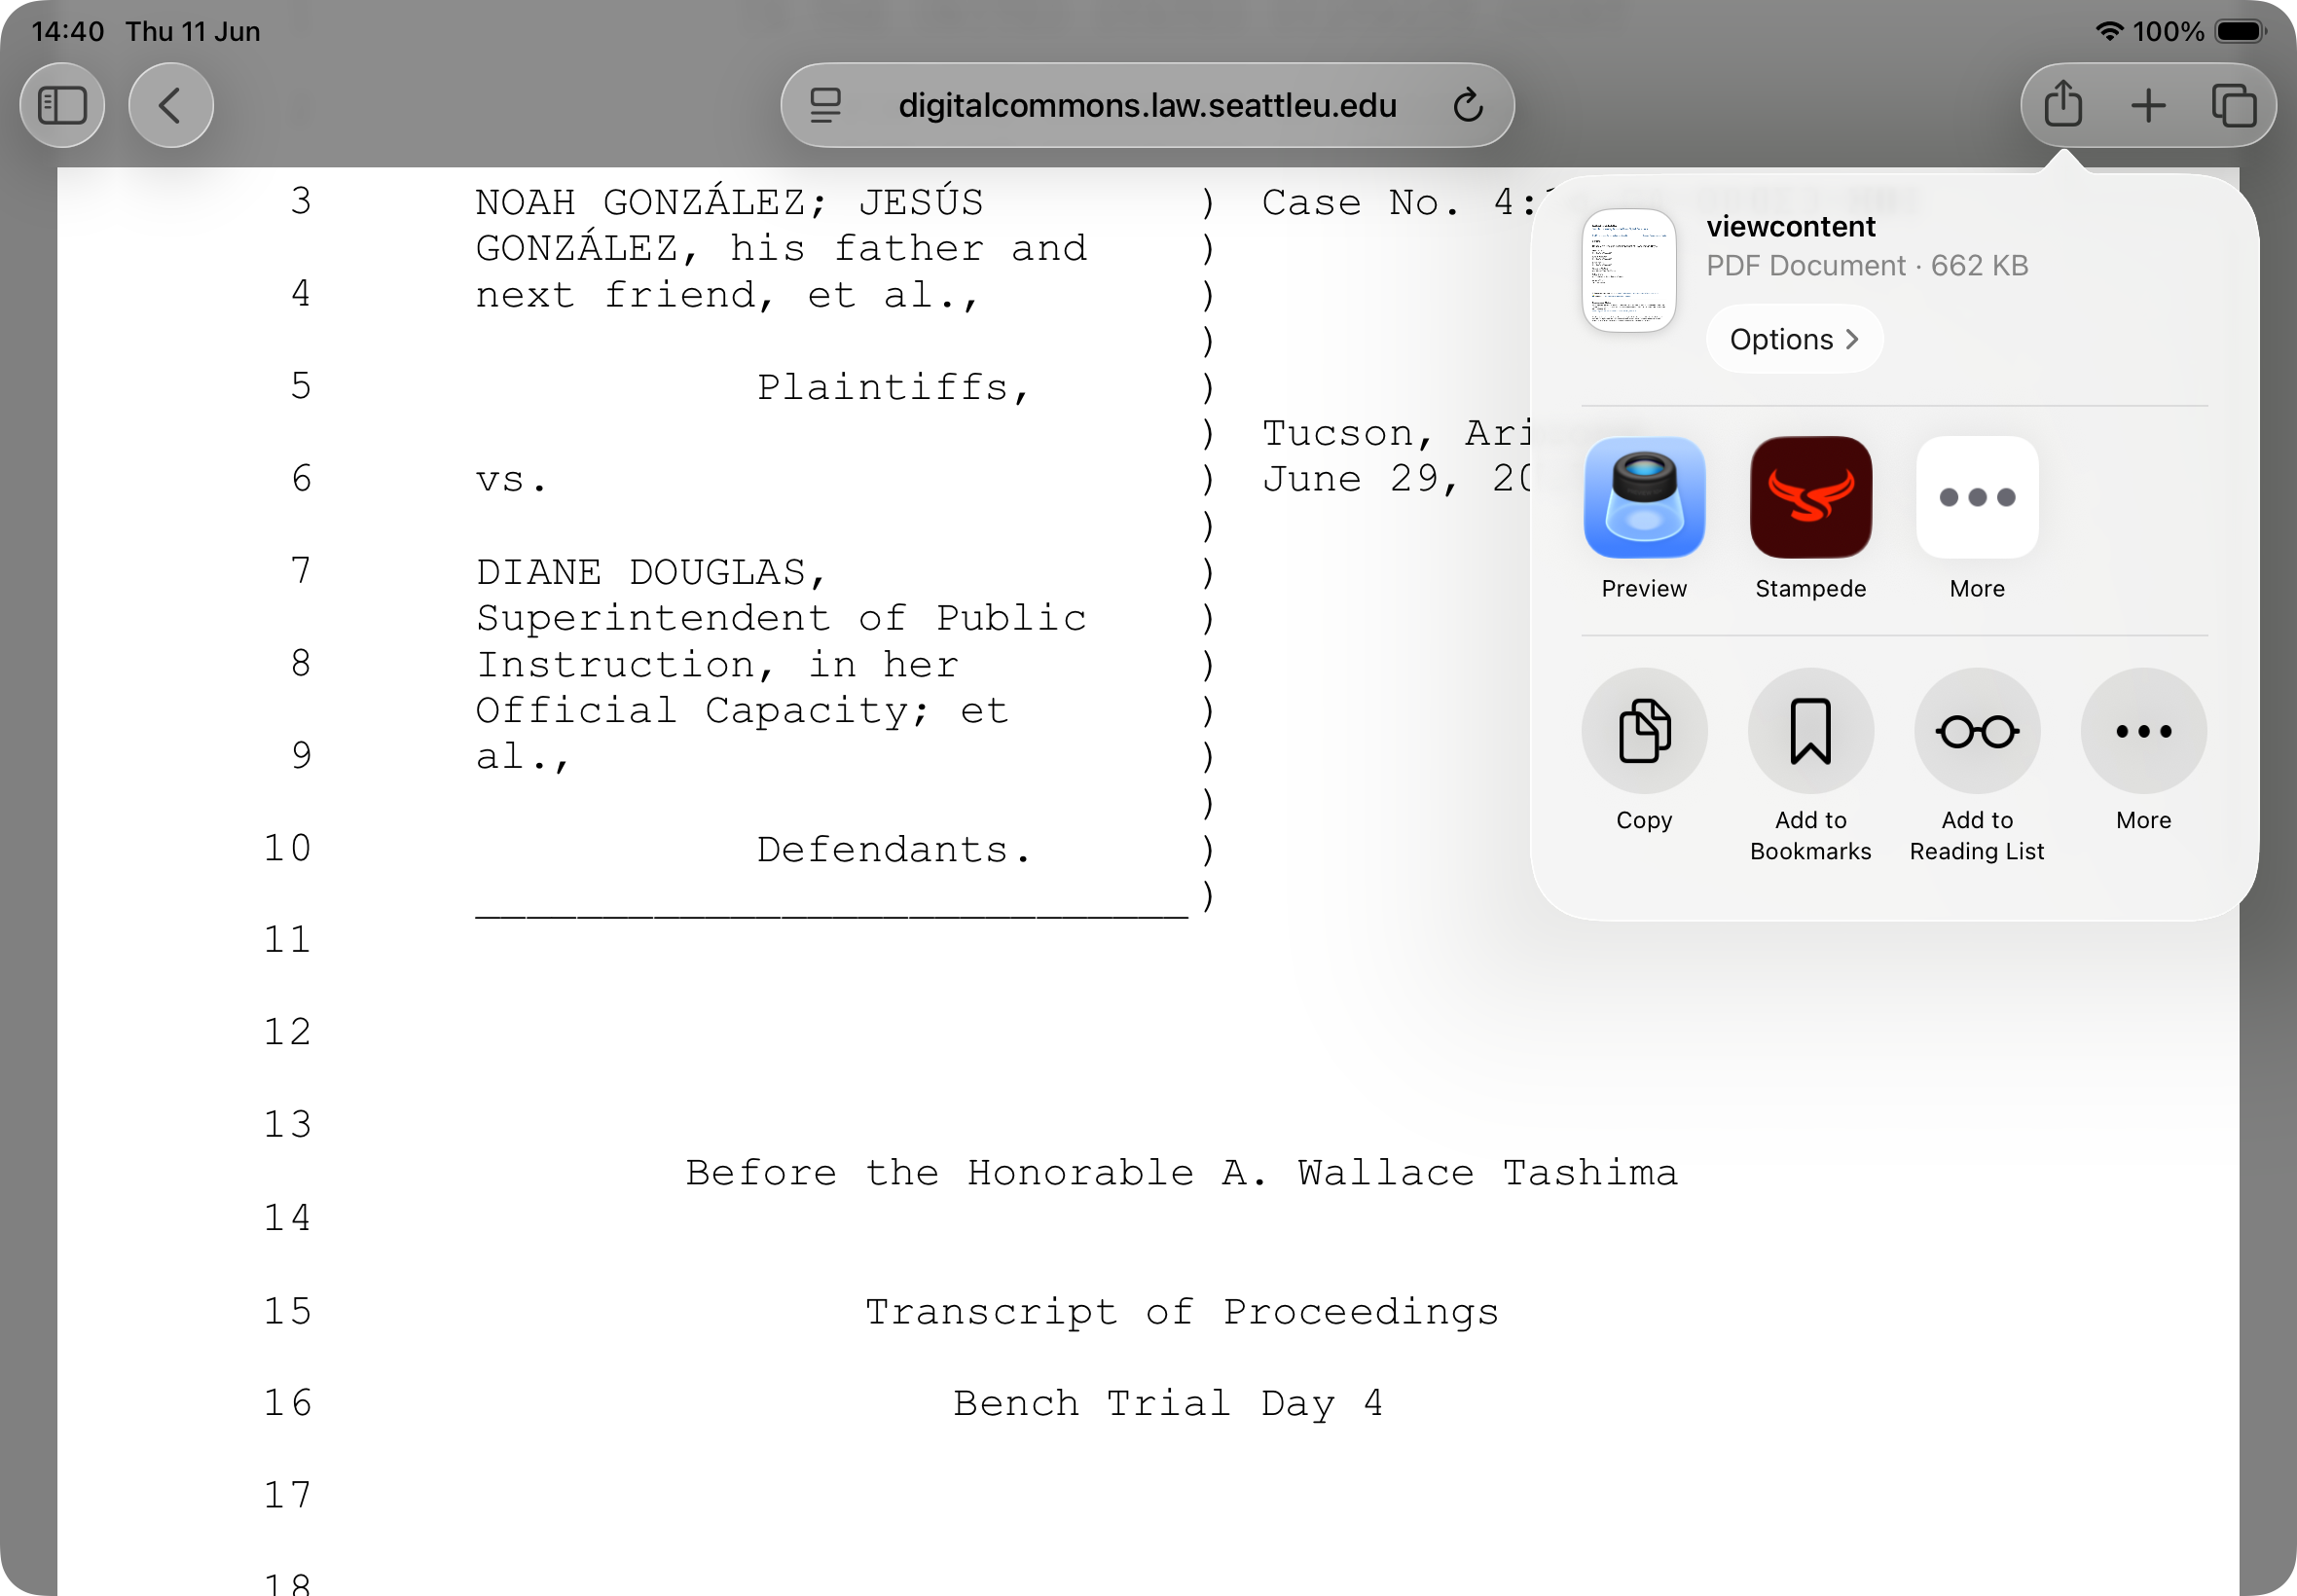
If you open a PDF in Safari — from a client portal, publication site, cloud link, or search result — you can send it directly to Stampede without downloading it first. Open the PDF, tap the Share button (the box with an arrow, top-right), and choose Stampede from the app row. Stampede will import and open it immediately.
Importing from Mail or other apps
Any app that can share a PDF — Mail, Dropbox, Files, AirDrop — can send it to Stampede via the same Share sheet. Look for the Stampede icon (the red bull's head) in the list of apps. If you don't see it, tap More to find it.
2 The Home Screen
The home screen is your document library. Every PDF you've imported appears here as a card showing the document name. Documents are listed with the most recently opened at the top.
Screenshot
Home screen in light mode — Recent Documents grid
Reopening a document
Tap any card to reopen that document. Stampede remembers your scroll position and zoom level, so you return to exactly where you left off.
Renaming a document
Long-press a document card to reveal the rename option. This changes how the document is labelled in your Recent Documents list without affecting the file name used on export.
Dark and light mode
The half-circle icon in the top-right corner toggles between light and dark mode. Both modes are fully supported throughout the app. Dark mode is easier on the eyes during long reading sessions and works particularly well alongside the Reading Modes described in section 11.
Screenshot
Home screen in dark mode
3 Reading a Document
Once a document is open, the PDF fills the screen with the toolbar running across the top. Stampede uses standard iPad gestures throughout.
Navigation
- —Scroll — swipe up and down to move through the document continuously
- —Zoom — pinch to zoom in or out; double-tap to toggle between fit-to-width and a zoomed view
- —Jump to first/last page — tap the page indicator at the bottom edge of the screen to access first/last page buttons
Multiple documents (tabs)
Stampede supports having several documents open at once. Each open document appears as a tab in the top-left area of the toolbar. Tap a tab to switch to that document, or tap the × on a tab to close it. If you have unsaved annotation changes, Stampede will ask you to confirm before closing.
Screenshot
Reader view showing toolbar and document tabs
Returning to the home screen
Tap the back arrow (‹) at the far left of the toolbar to return to the home screen. Your document stays open and will reappear in the tabs next time you return.
4 The Toolbar
The toolbar runs across the top of the reader and gives you quick access to every feature. On a standard-width iPad in full screen, all tools are visible at once. In Split View or Stage Manager, some tools move into a ⋯ overflow menu to keep things tidy.
Screenshot
Full toolbar — all icons visible
Resizing the toolbar
If you work in Stage Manager or Split View, the toolbar adapts automatically. You can also drag the grip handles between sections (tabs, presets, and tools) to rebalance the space. Your layout is remembered between sessions.
Pinnable tool presets
Frequently used tool configurations — a particular pen colour, text size, or stamp — can be pinned to the toolbar as presets for one-tap access. Long-press a preset chip to see its full name or to remove it.
5 Annotations
Annotations are the heart of Stampede. All annotations are saved in your working copy and travel with the document when you export.
Selecting text
Press and hold on any word to begin a text selection. Drag the handles to extend the selection. When you lift your finger, a menu appears with annotation options.
Some PDFs contain text that is incomplete, protected, or drawn in a way iPadOS cannot select reliably. If Stampede detects that selection is limited, it shows a warning instead of letting you keep fighting the page.
Screenshot
Text selected with handles visible and annotation menu showing
Annotation types
Highlight
Colour-fills the selected text. Useful for flagging passages that need attention.
Underline
Draws a line beneath selected text. A classic proofreading mark.
Strikethrough
Draws a line through selected text to indicate a deletion.
Text note
Places a formatted text box anywhere on the page. Font, size, and colour are fully customisable.
Sticky note
A pinned comment marker. Tap the marker to read or edit the note text.
Changing annotation colour
Tap an existing annotation to select it. A colour picker appears near the annotation — tap any swatch to recolour it. For multi-line highlights or underlines applied in one action, all fragments change together.
Copying selected text as a styled annotation
After selecting text, use the copy option to turn that selection into a reusable styled text annotation. Stampede confirms the copy with a brief toast; then long-press blank space on the page and paste it where you need it.
Text annotations
Tap the Abc button in the toolbar, then tap anywhere on the page to place a text box. A font properties panel appears where you can set the typeface, size, colour, bold, and italic. Your last-used settings are remembered for the next text annotation.
Screenshot
Font properties panel open next to a text annotation
Adding a note, stamp, or text from empty space
Long-press on any blank area of the page (not on existing text) to bring up the insertion menu, which lets you add a text box, sticky note, or stamp at that exact location.
Sticky notes
Sticky notes appear as small page markers until you open them. Tap the marker to read or edit the note, change its colour, copy it, or delete it. They are useful for longer comments that would clutter the page as visible text.
Undo and redo
Every annotation action — adding, moving, recolouring, deleting — can be undone with the Undo button in the toolbar. Undo history is per-document and holds up to 50 steps. To review your history, long-press the Undo button.
6 Stamps
Stamps are reusable text labels you can drag onto the page with a single gesture. They are designed for the kinds of shorthand marks proofreaders use repeatedly — query words, correction codes, exhibit labels, and so on.
Opening the stamps panel
Tap the paw-print icon in the toolbar. The stamps panel slides in from the right edge of the screen (or the left, if you've moved it). It stays open while you work and can be dismissed by tapping the same icon again or swiping it away.
Screenshot
Stamps panel open on the right, showing example stamps
Placing a stamp
Drag any stamp from the panel directly onto the page and drop it where you want it to appear. A ghost preview follows your finger as you drag. Alternatively, tap a stamp to arm it — a banner confirms it's ready — then tap the page at the target location.
Creating a stamp
Tap the + button at the top of the stamps panel. In the New Stamp dialog:
- 1 Type the stamp text (e.g. spelling?, stet, EXHIBIT 1)
- 2 Choose Bold or Italic if needed
- 3 Select a font and size
- 4 Pick a colour from the swatches
- 5 Tap Save
Screenshot
New Stamp dialog with text, font, size, and colour options
Searching your stamps
Use the search bar at the top of the panel to filter stamps by name. This is handy when your library grows large.
Panel options menu
Tap the ⋯ menu button at the top of the panel for additional options:
- —Sort A–Z / Sort Z–A — reorder your stamp library alphabetically
- —Backup Stamps — export your entire stamp library as a file, useful before switching devices or reinstalling
- —Restore Stamps — import a previously backed-up stamp library
- —Move Panel to Left / Right — flip the panel to the opposite edge of the screen
Screenshot
Stamps panel ⋯ menu open
Pinning stamps as toolbar presets
Long-press a stamp in the panel to pin it to the toolbar as a one-tap preset. Pinned stamps appear as small coloured chips (showing the first two letters) in the toolbar's presets section. Long-press a preset chip to see its full name or unpin it.
7 Drawing
The draw tool lets you add freehand ink and shapes directly on the page — useful for circling text, drawing arrows, or adding a hand-drawn mark that doesn't fit a standard annotation type.
Using the draw tool
Tap the pen icon in the toolbar to enter drawing mode. A drawing toolbar appears with pen, marker, eraser, arrow, and shape options. Draw with your finger or an Apple Pencil.
Drawing arrows
Choose the arrow tool, then drag from the tail toward the point you want to indicate. Stampede generates the arrowhead for you and keeps arrow undo/redo grouped as one action.
Strokes and shapes
Stampede can recognise shapes — draw a rough rectangle, circle, or line and hold at the end of the stroke to snap it to a clean shape. Straight-line detection helps keep ruled underlines tidy.
Selecting and moving strokes
Switch to the selection tool within the drawing toolbar to tap or lasso individual strokes. Selected strokes can be dragged to a new position, resized with handles, or deleted.
Exporting drawings
Drawings export as standard PDF ink annotations, meaning they are fully visible in any PDF viewer and can be edited in compatible apps.
Screenshot
Drawing mode active with the drawing toolbar visible
8 Proofreading
The Proofreading panel runs automated checks on your document and presents findings one at a time, so you can review and act on each issue without losing your place.
Opening the panel
Tap the Proofread button in the toolbar (or find it in the ⋯ overflow menu). The panel appears as a strip at the bottom of the screen.
Choosing a check type
Select the kind of check you want to run:
- —Spellcheck — finds words not in the dictionary, flagging potential typos and document errors
- —Other check modes — additional checks appear in the panel depending on the document content
Working through findings
Once a check runs on the current page, the panel steps you through each finding. Stampede jumps to the relevant part of the page and highlights the flagged text. For each finding you can accept it (mark as reviewed), annotate it, or skip it. When the current page is clear, move to the next page with a single tap.
Screenshot
Proofreading panel strip at the bottom of the screen with a finding highlighted
9 Research Panel
The Research panel gives you quick access to reference websites with a single tap, pre-filled with selected text from your document. It's designed for the moments when you need to verify a name, a legal term, or a citation without switching apps and retyping.
Using the Research panel
- 1 Select a word or phrase in the document
- 2 Tap Research in the selection menu (or in the toolbar)
- 3 The panel appears with your selected text pre-loaded in the search field
- 4 Tap any link in the panel to open that resource in Safari with your search term
Screenshot
Research panel open with selected text in the search field and reference links below
Customising your research links
Tap the settings icon in the Research panel to add, remove, or reorder links. You can add any website you regularly consult — legal dictionaries, court databases, terminology references, or house-style guides. Links are organised by category.
10 Search
The search bar finds text across both the document content and your own annotations, letting you jump to any matching passage instantly.
Searching document text
Tap the magnifying glass icon in the toolbar. Type a word or phrase and results appear highlighted in the document. Use the next/previous arrows to step through matches.
Searching annotations
The same search bar also searches your annotation text — sticky note contents, text boxes, and stamp labels. This makes it easy to find all the places you added a specific stamp or note, even across a long document.
Screenshot
Search panel open with results highlighted in the document
11 Reading Modes
Reading modes apply a translucent colour overlay to the page, softening the contrast and reducing eye strain during long sessions. Tap the eye icon at the right of the toolbar to choose a mode.
None
Standard white page — full contrast, no overlay.
Sepia
A warm amber tint. Softer than plain white and easier for extended reading.
Green
A subtle green overlay, popular with readers sensitive to eye fatigue.
Dark
A near-dark overlay for very low-light environments. Pair with Dark Mode for the best effect.
Screenshot
Sepia reading mode applied — warm tinted page
12 Exporting
When your annotations are complete, export the document to share it, email it to a client, or archive it. Tap the Export button (box with an arrow) in the toolbar.
Export formats
- —Flattened PDF — annotations are merged into the page as permanent marks. Ideal for sharing with anyone, as no PDF reader is required to display them correctly.
- —Editable PDF — annotations remain as editable PDF objects. Useful if the recipient needs to adjust them in another PDF editor.
- —Annotations only — exports just your annotations as a separate summary. Useful for sending a concise set of corrections back to the originator.
- —Errata — exports a formatted list of corrections suitable for submission as an errata sheet.
Naming your export
Before export, Stampede presents a sheet where you can type the filename and job name. This name is used for both the file and the subject line if you choose to share via Mail — saving you a step.
Sharing options
After naming, the standard iOS Share sheet appears. You can send the file via Mail, save it to Files or iCloud Drive, AirDrop it, or open it in another app. Any output format can be shared this way.
Screenshot
Export sheet with filename field and format options